Drawing anime can seem daunting. You might think, “Where do I even start?” But trust me, it’s not as complicated as it looks. This article is here to break it down for you.
We’ll show you how to create a sketsa lukisan anime simple. It’s just a basic sketch of an anime character, and it’s the perfect way to begin. By the end, you’ll have a recognizable anime face on your paper.
No fancy tools or prior experience needed. Just grab a pencil and some paper, and let’s get started.
What Makes a Sketch Look Like Anime?
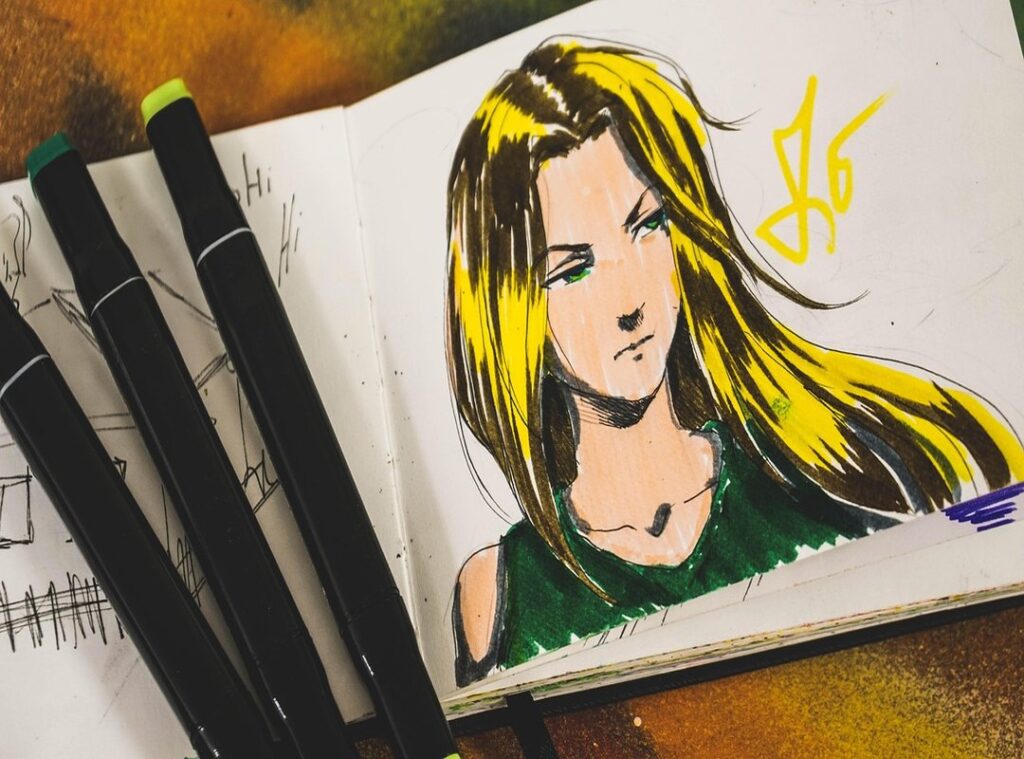
When you think of anime, what’s the first thing that comes to mind? For most, it’s those large, expressive eyes. They’re the hallmark of the style, and they can convey a wide range of emotions.
Add some highlights—those little white dots—to make them really pop.
Next up, let’s talk about the face. The facial anatomy in anime is super simplified. You’ll often see a small nose, sometimes just a dot or a line, and a simple mouth.
This minimalism helps focus attention on the eyes and the overall expression.
Now, onto the hair. In anime, hairstyles are drawn in stylized clumps or spikes, not individual strands. This gives the hair volume and movement, making it look dynamic and lively.
The head shape is another key element. It’s usually a combination of a circle for the cranium and a pointed, V-shaped jawline for the chin. This creates a distinctive, recognizable silhouette.
- Large, expressive eyes with highlights
- Simplified facial features (small nose and simple mouth)
- Stylized, voluminous hair
- Distinctive head shape (circle cranium and V-shaped jawline)
Mastering these basic elements is the key to achieving that distinct ‘anime look’ in a simple sketch. Whether you’re drawing a quick sketsa lukisan anime simple or a more detailed illustration, these features will help you capture the essence of the style.
The Only 3 Tools You Need to Get Started
The Pencil. A standard #2 or HB pencil is perfect for sketching. Sketching lightly is crucial for easy erasing.
Paper. Start with basic printer paper or a simple sketchbook. The goal is practice, not creating a sketsa lukisan anime simple on the first try.
A Good Eraser. I suggest a kneaded eraser for its ability to lift pencil marks without smudging. But any clean eraser will work just fine.
You don’t need expensive Copic markers or digital tablets to learn. The fundamentals are built with these simple tools.
Pro tip: Keep a separate sheet of paper under your hand as you draw to prevent smudging your work.
How to Sketch a Simple Anime Face: A 5-Step Guide

Drawing sketsa lukisan anime simple can be a lot of fun, and with these five steps, you’ll be on your way to creating your own characters in no time. Let’s dive in!
Step 1: The Foundation – Head and Guidelines. Start by drawing a circle, and this will be the head.
Add a vertical line down the center and a horizontal line across the middle. Below the circle, draw the jawline coming to a soft point. Think of it as giving your character a subtle chin.
(No one likes a sharp chin, right?)
Step 2: Placing the Eyes. Use the horizontal guideline as the center for the eyes. Draw two large almond or oval shapes, leaving a space roughly one eye-width between them.
Add a large circle for the iris and a smaller one for the pupil. Remember, big, expressive eyes are a hallmark of anime style. sketsa lukisan anime simple
Step 3: Drawing the Nose and Mouth. Position the nose, a simple dot or small vertical line, on the center vertical line, halfway between the eyes and the chin. Place the mouth, a simple curved line, just below the nose.
Keep it minimal; less is more in anime.
Step 4: Sketching the Hair. Start by drawing the hairline on the forehead, then add the fringe or bangs. Sketch the rest of the hair in large, flowing sections that frame the face and go beyond the initial circle outline.
Feel free to get creative here—spiky, wavy, or even gravity-defying hair is all fair game.
Step 5: Finalizing with Neck and Shoulders. Draw two vertical lines down from the edges of the jaw to form the neck. Add gently sloping lines outward from the base of the neck to indicate the shoulders, giving the sketch a finished look.
And there you have it, a simple yet charming anime face!
Now, go ahead and practice. Before you know it, you’ll be churning out sketsa lukisan anime simple like a pro. Just remember, every artist starts somewhere, and a little bit of humor goes a long way!
Common Mistakes Beginners Make (And How to Avoid Them)
When you’re just starting out, it’s easy to get caught up in the excitement and overlook some basics. Trust me, I’ve been there.
Mistake 1: Misaligned Features. Skipping the initial guidelines can lead to crooked or uneven eyes and mouths. Always sketch your guidelines so lightly they are almost invisible.
This way, you have a solid foundation for your drawing.
Mistake 2: Pressing Too Hard with the Pencil. Dark, heavy lines are tough to erase and make the sketch look stiff. Light, confident strokes are key.
It’s all about finding the right balance.
Mistake 3: ‘Floating Head’ Syndrome. Adding a neck and at least a hint of the shoulders grounds the character. This makes the drawing look more complete and natural.
Don’t leave your characters floating in space!
Mistake 4: Drawing Every Single Strand of Hair. Anime hair is about capturing the shape and flow in large clumps, not tedious detail. Focus on the overall form and movement.
It’s like sketsa lukisan anime simple—less is often more.
By avoiding these common mistakes, you’ll see a big improvement in your drawings. Keep practicing, and don’t be too hard on yourself. We all start somewhere.
Your Journey into Anime Art Starts Now
Creating a sketsa lukisan anime simple is achievable for anyone by following a structured, step-by-step process. The foundation lies in basic shapes, guidelines, and understanding the core elements of the anime style.
Stop reading and start doing. The most important step is to pick up a pencil and try drawing the first circle. Every sketch is a step forward, and practice is the only secret to improvement.
 There is a specific skill involved in explaining something clearly — one that is completely separate from actually knowing the subject. Shirley Forbiset has both. They has spent years working with home design inspirations in a hands-on capacity, and an equal amount of time figuring out how to translate that experience into writing that people with different backgrounds can actually absorb and use.
Shirley tends to approach complex subjects — Home Design Inspirations, Interior Decorating Tips, Sustainable Home Practices being good examples — by starting with what the reader already knows, then building outward from there rather than dropping them in the deep end. It sounds like a small thing. In practice it makes a significant difference in whether someone finishes the article or abandons it halfway through. They is also good at knowing when to stop — a surprisingly underrated skill. Some writers bury useful information under so many caveats and qualifications that the point disappears. Shirley knows where the point is and gets there without too many detours.
The practical effect of all this is that people who read Shirley's work tend to come away actually capable of doing something with it. Not just vaguely informed — actually capable. For a writer working in home design inspirations, that is probably the best possible outcome, and it's the standard Shirley holds they's own work to.
There is a specific skill involved in explaining something clearly — one that is completely separate from actually knowing the subject. Shirley Forbiset has both. They has spent years working with home design inspirations in a hands-on capacity, and an equal amount of time figuring out how to translate that experience into writing that people with different backgrounds can actually absorb and use.
Shirley tends to approach complex subjects — Home Design Inspirations, Interior Decorating Tips, Sustainable Home Practices being good examples — by starting with what the reader already knows, then building outward from there rather than dropping them in the deep end. It sounds like a small thing. In practice it makes a significant difference in whether someone finishes the article or abandons it halfway through. They is also good at knowing when to stop — a surprisingly underrated skill. Some writers bury useful information under so many caveats and qualifications that the point disappears. Shirley knows where the point is and gets there without too many detours.
The practical effect of all this is that people who read Shirley's work tend to come away actually capable of doing something with it. Not just vaguely informed — actually capable. For a writer working in home design inspirations, that is probably the best possible outcome, and it's the standard Shirley holds they's own work to.