Introduction
Vlogging didn’t just survive the past few years of digital chaos—it adapted fast. While platforms shifted algorithms and formats, creators kept experimenting, learning, and growing audiences in real time. Long gone are the days when sticking to one formula or upload schedule worked. Today’s most successful vloggers are agile, tuned in, and comfortable pivoting when the road zigs instead of zags.
Heading into 2024, the rules of the game are evolving again. New tools, tighter platform policies, and a hungrier audience are pushing vloggers to be sharper, more intentional, and more strategic. It’s no longer about just showing up—it’s about what you bring when you do. Creators who stay curious, consistent, and community-minded will be the ones still standing at the end of this next shift.
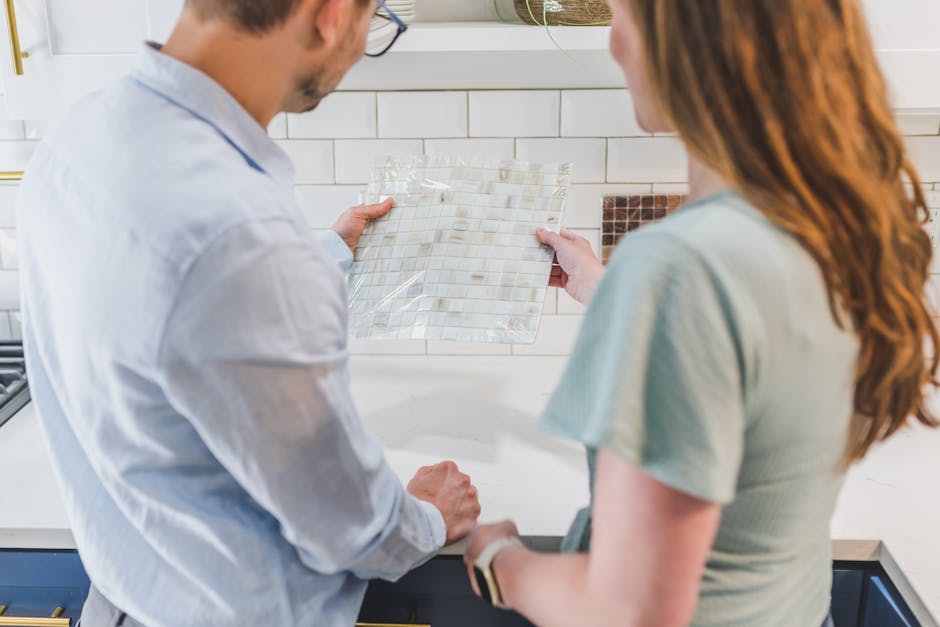
Backsplashes do more than protect your walls. They set the tone for your kitchen, whether you’re after sleek modern, warm and rustic, or something in between. But before diving in, it helps to know what you’re getting into.
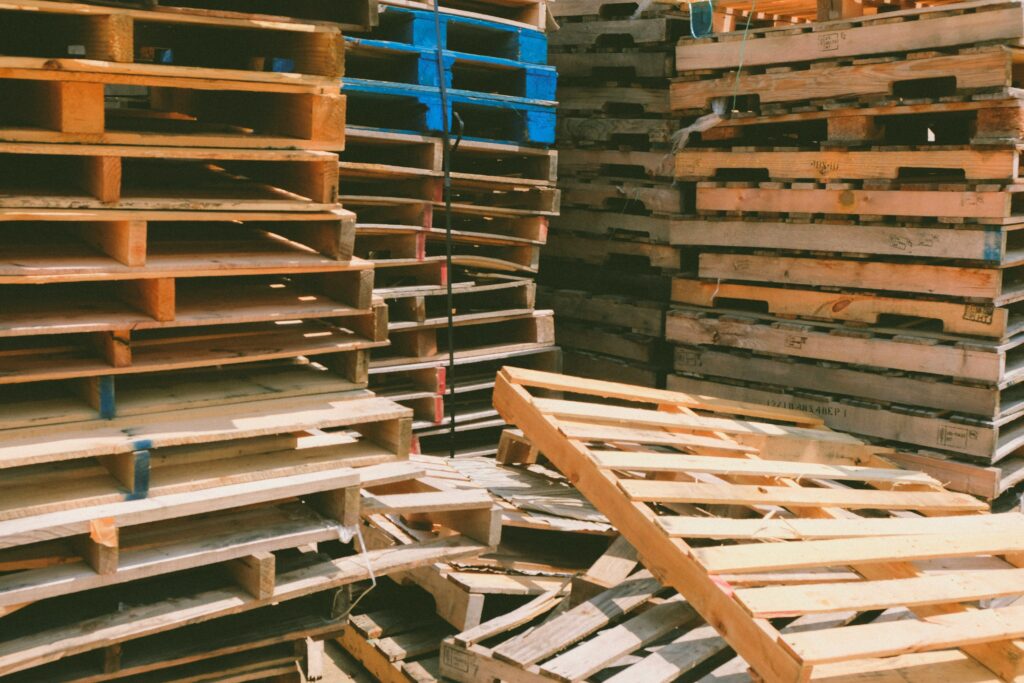
Tile is the classic choice. Ceramic and porcelain options offer tons of patterns and colors. They hold up well and are relatively affordable, but they take time and a steady hand to install right. Grout lines need regular cleaning, especially behind a busy stove.
Peel-and-stick panels are the go-to for renters or anyone wanting a fast refresh. You don’t need special tools, and you can slap them on in an afternoon. Downside? They’re less durable and can peel over time if moisture gets in.
Glass brings gloss and light. It’s great for smaller kitchens or minimalist setups. Easy to wipe clean, but pricey—and not a beginner DIY project. Breakage during install is also a risk.
Metal backsplashes (think stainless steel or copper) give off serious chef’s kitchen vibes. They’re heat-resistant and easy to clean. They also reflect light well. But fingerprints and scratches can show, and they’re often more expensive.
Choosing your backsplash is about balancing style, budget, and what you can realistically install. The right call won’t just change your walls—it’ll shift the whole personality of your kitchen.
Before you ever lay a tile, you need the right gear and a clear plan. The basics: a utility knife, a notched trowel, a level, tile spacers, a measuring tape, and buckets for mixing and cleaning. You’ll also want a sponge, a chalk line, and a tile cutter or wet saw depending on your tile type. Don’t skimp here—the right tools make the work cleaner and faster.
Next comes prep. Clean your surface until it’s spotless. No dust. No grease. Then measure your space twice, maybe three times. Use a chalk line or painter’s tape to mock up your layout so you know exactly where your cuts and seams are going to fall. This isn’t just helpful—it’s essential to avoid ugly surprises mid-job.
The biggest mistake people make? Skipping the dry layout. They go straight from the box to the floor and end up with slivers of tile on one edge or awkward gaps. Take the extra 15 minutes to mock it out on the floor before applying adhesive. That prep will save you hours of frustration later.
When it comes to installing tile or backsplash, prep and precision make all the difference. Whether you’re using mortar or peel-and-stick adhesive, the method has to be clean and consistent. For mortar, mix it until it’s peanut butter thick. Spread evenly using a notched trowel, working in small sections so it doesn’t dry out before your pieces go down. With peel-and-stick, make sure the wall is spotless. Dust and uneven surfaces will ruin adhesion.
Your layout should start with a level line, usually at the center or focal point of the wall. Use a long level or a laser level to strike your starting grid. Find the symmetry before you apply anything. This keeps you from discovering—too late—that your last row ends in an awkward sliver or mismatch.
For cuts around outlets and corners, patience pays off. Use a tile cutter for straight lines and a rotary tool or tile nippers for notches and odd shapes. Dry-fit pieces before locking them in, and leave small gaps for movement and grout. Clean cuts aren’t fast, but they make the final look feel dialed in. The goal is solid, straight, and built to last.
Grouting looks simple until you’re in the thick of it—literally. It’s messier than it seems and unforgiving if you take shortcuts. First, mix your grout to a peanut butter consistency. Not too dry, not too runny. Start applying diagonally across the tiles with a rubber float, pressing it in deep to avoid air pockets. You’ll probably make a mess. That’s fine.
Once the grout sets for about 15 to 30 minutes, wipe it down with a damp sponge. Wipe diagonally again to avoid pulling grout out of the lines. Rinse your sponge often and don’t flood the surface with water. You’re going for clean lines, not a mud bath.
After 24 hours, check your lines. If they’re dry and solid, it’s time to seal. Use a sealer made for your grout type and apply carefully along the lines only. This helps protect against stains, moisture, and wear.
And curing? It matters. Give it at least 72 hours before heavy use. No shortcuts. Long-term, wipe down tiled areas regularly and avoid harsh cleaners that eat away at the sealant. Keep it clean and it’ll last. Skip the maintenance and you’ll be scraping out mold in a few months.
There’s a sweet spot above the kitchen backsplash that often gets ignored. It’s valuable space, and with the right move, it can serve both form and function. Floating shelves are a smart and simple option. They give you extra storage while adding a design moment right where your eye lands. Whether you’re showing off handmade mugs, stacking cookbooks, or just adding some greenery, they earn their keep.
To make it work visually, think in terms of connection. Mirror the hardware finishes you already have, echo the cabinet lines, or pull a shade from your backsplash tile into the shelf stain or decor. This ties everything together without trying too hard.
If you’re new to building your own, this is definitely worth a look: Beginner’s Guide to Building Custom Floating Shelves.
Sealing the deal starts with good caulking. Edges around your backsplash need to be tight, uniform, and clean. Use a high-quality silicone caulk that matches your grout or tile color for a seamless look. Tape off the edges if you’re new to the game, and use a damp finger or finishing tool to smooth the bead before it cures. Skip this step and the entire job can look amateur.
Lighting is where your backsplash gets the spotlight—literally. Undercabinet LEDs are the go-to, adding dimension and subtle drama without being overpowering. Think warm white for a cozy vibe or cool white for a modern punch. For extra flair, go with dimmable strips that can shift based on time of day or mood.
Now, understand the difference between ambient and task lighting. Ambient lighting fills the space gently, setting an overall tone. Task lighting, like undercabinet fixtures, targets specific areas where you work. Smart placement means layering both. Keep ambient lights high and broad; use task lighting low and focused. Together, they bring function and style to your backsplash while keeping shadows and eye strain at bay.
Finishing a backsplash project feels good—and it should. You’ve upgraded your space with something that actually does double duty: looking sharp and protecting your walls. If you’ve kept your lines clean and your materials tight, you’ve already knocked out the hardest part.
Now comes the part that keeps it looking solid. Maintenance doesn’t have to be complicated. Wipe it down regularly with a damp cloth and a mild cleaner. Skip the abrasive stuff—no harsh chemicals or rough sponges. For grout, a soft brush and some baking soda can go a long way. Keep an eye out for cracked tiles or loose edges. Fix them early, and they won’t become a bigger problem later.
And if you’re thinking about round two—a fresh pop of color or a smarter tile layout—it doesn’t always mean gutting what you’ve done. Even a small DIY tweak like a bold grout color or an accent strip can reset the whole vibe. Minimal effort. Big return. Your hands can handle it.
 Irene Mooressit writes the kind of outdoor living ideas content that people actually send to each other. Not because it's flashy or controversial, but because it's the sort of thing where you read it and immediately think of three people who need to see it. Irene has a talent for identifying the questions that a lot of people have but haven't quite figured out how to articulate yet — and then answering them properly.
They covers a lot of ground: Outdoor Living Ideas, DIY Home Improvement Projects, Sustainable Home Practices, and plenty of adjacent territory that doesn't always get treated with the same seriousness. The consistency across all of it is a certain kind of respect for the reader. Irene doesn't assume people are stupid, and they doesn't assume they know everything either. They writes for someone who is genuinely trying to figure something out — because that's usually who's actually reading. That assumption shapes everything from how they structures an explanation to how much background they includes before getting to the point.
Beyond the practical stuff, there's something in Irene's writing that reflects a real investment in the subject — not performed enthusiasm, but the kind of sustained interest that produces insight over time. They has been paying attention to outdoor living ideas long enough that they notices things a more casual observer would miss. That depth shows up in the work in ways that are hard to fake.
Irene Mooressit writes the kind of outdoor living ideas content that people actually send to each other. Not because it's flashy or controversial, but because it's the sort of thing where you read it and immediately think of three people who need to see it. Irene has a talent for identifying the questions that a lot of people have but haven't quite figured out how to articulate yet — and then answering them properly.
They covers a lot of ground: Outdoor Living Ideas, DIY Home Improvement Projects, Sustainable Home Practices, and plenty of adjacent territory that doesn't always get treated with the same seriousness. The consistency across all of it is a certain kind of respect for the reader. Irene doesn't assume people are stupid, and they doesn't assume they know everything either. They writes for someone who is genuinely trying to figure something out — because that's usually who's actually reading. That assumption shapes everything from how they structures an explanation to how much background they includes before getting to the point.
Beyond the practical stuff, there's something in Irene's writing that reflects a real investment in the subject — not performed enthusiasm, but the kind of sustained interest that produces insight over time. They has been paying attention to outdoor living ideas long enough that they notices things a more casual observer would miss. That depth shows up in the work in ways that are hard to fake.